Search for:
How to use a baby carrier safely.
Carrying a Baby Safely: the Checks Each Time

I remember sitting in the hospital breakroom at 3:00 AM, staring at a glossy instructional pamphlet that made using a structured carrier look as easy as putting on a pair of trainers. The diagram showed a perfectly calm, upright infant, tucked into a pristine wrap that looked like it had never seen a spilled bottle of milk in its life. It was a lie. When my second child was four months old, I found myself standing in a dark hallway, sweating, wrestling with five different straps, and wondering if I was actually following the rules for how to use a baby carrier safely or if I was just creating a very expensive, very complicated way to trip over the cat.

I’m not here to sell you a £200 ergonomic miracle or recite the manufacturer’s manual back to you like a robot. I’ve spent eleven years on a paediatric ward and four years in the trenches of my own living room, and I know that real-world safety looks a lot messier than the pictures. I’m going to give you the actual mechanics of what matters—the chin position, the hip alignment, and the weight distribution—alongside the truth about when you’re too tired to bother with the fancy stuff and just need to know if your baby is actually okay.

Table of Contents

The Manual Says One Thing but Reality Says Another

The Manual Says One Thing but Reality Says Another.

The manual is a masterpiece of clinical perfection. It shows a diagram of a baby sitting in perfect ergonomic babywearing positions, spine curved like a little ‘C’, weight distributed evenly, everything looking calm and coordinated. It’s lovely. It’s also a lie. In reality, you’re usually trying to adjust a complicated web of buckles while a six-month-old is actively trying to climb out of the fabric, or you’re attempting to walk from the car to the front door in a downpour.

When I was nursing on the ward, the textbook answer for preventing airway obstruction in carriers was straightforward: chin off chest, face visible. But when you are on your fourth cup of lukewarm coffee and the baby has finally drifted into a deep sleep, the fear isn’t just about the position; it’s the sheer, heavy exhaustion of trying to get it exactly right every single time. You start to wonder if you’re doing it wrong because the manual makes it sound like a high-stakes engineering project, when really, you’re just trying to get through the grocery shop without a meltdown.

Mastering How to Use a Baby Carrier Safely Without Panicking

Mastering How to Use a Baby Carrier Safely Without Panicking

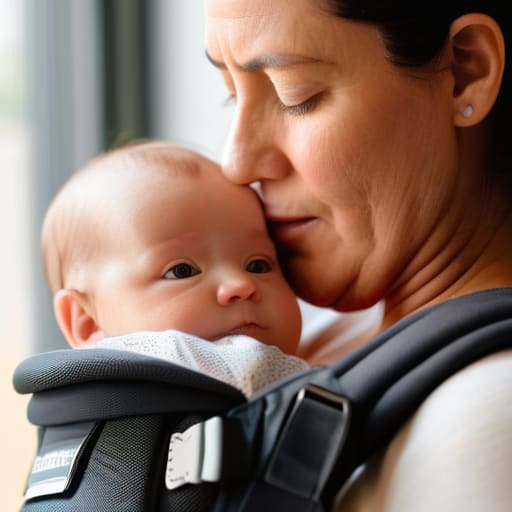
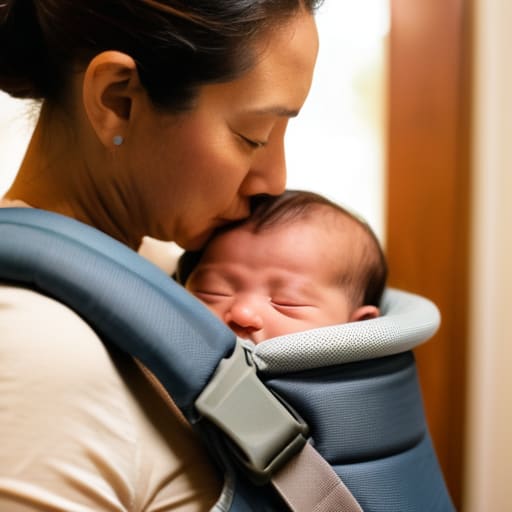
When I was working the night shifts on the paediatric ward, I saw plenty of parents who looked like they were carrying a ticking time bomb rather than a sleeping infant. That’s the fear, isn’t it? You want the hands-free freedom, but you’re terrified of the “what ifs.” To quiet that noise, you need to internalize the TICKS safety rules explained in a way that doesn’t require a textbook. It’s about making sure their chin is off their chest—because even a slight tilt can lead to preventing airway obstruction in carriers being your only real job—and ensuring they are close enough that you can kiss the top of their head without leaning over.

I remember my second, Leo, was about three months old when I finally stopped fumbling with the straps. I realized that achieving ergonomic babywearing positions isn’t about perfection; it’s about the “M” shape. His knees should be higher than his bottom, supporting hip healthy babywearing so he isn’t slumped like a sack of flour. If he’s looking down at his toes, he’s not safe. If he’s looking at you, he’s doing just fine.

The Ticks Safety Rules Explained for the Sleep Deprived Parent
The Ticks Safety Rules Explained for the Sleep Deprived Parent.

If you’ve been scrolling through parenting forums, you’ve likely seen the acronym TICKS. It’s the gold standard for preventing airway obstruction in carriers, and as a former nurse, I’ll tell you that the science behind it is solid. But when you’re standing in a dim hallway at 3:00 AM with a heavy, wriggling six-month-old, an acronym can feel like just another thing to memorize. Let’s break it down into what actually matters.

T is for Tight—the carrier needs to be snug enough that you can feel the baby’s warmth against your chest. I, for one, learned this the hard way with my second; if the fabric is too loose, they slump, and that’s when things get dangerous. I is for In view at all times; you should be able to see their face just by glancing down. C is for Close enough to kiss; their head should be right under your chin. K is for Keep chin off chest, which is vital for safe babywearing for newborns because a tucked chin can restrict their breathing. Finally, S is for Supported hips. You want them in those ergonomic babywearing positions where their legs form an ‘M’ shape, not dangling like a pendulum. It’s a lot to juggle, but once you get the rhythm, it becomes muscle memory.

Preventing Airway Obstruction in Carriers When You Are Exhausted

This is the part that keeps me up at night—and not just because of the caffeine withdrawal. When you are running on three hours of broken sleep, your spatial awareness goes out the window. You might find yourself sitting on the sofa, drifting off, and suddenly you realize your chin is tucked against your chest, and the baby’s face is pressed right into your sternum. In the ward, we called this positional asphyxia; at home, it’s just what happens when you’re trying to survive a Tuesday. Preventing airway obstruction in carriers isn’t about being a perfectionist; it’s about making sure that even when you are nodding off, the baby’s nose and mouth stay clear.

The golden rule I tell parents—and the one I had to drill into my own head with my second child—is to always keep their chin up. If you can’t see their face, you shouldn’t be sleeping. When you’re using safe babywearing for newborns, their neck muscles are basically non-existent, meaning they can’t correct their own position if they slump. If you feel yourself drifting, don’t fight it alone; sit on the floor or lean back firmly so you aren’t slumped forward. It’s much harder to accidentally smother a baby if you are physically incapable of leaning over them.

Ergonomic Babywearing Positions and Achieving Hip Healthy Babywearing

When I was working on the ward, I’d see parents coming in with babies whose legs looked like they were dangling straight down like two pieces of cooked spaghetti. It looks fine if you aren’t looking closely, but it’s not. For true hip healthy babywearing, you want that “M” shape—knees higher than the bottom, creating a little seat. I remember trying to get my second, Leo, into a structured carrier when he was about four months old; he kept sliding down, and I was so worried about his hips that I ended up walking like a penguin for three days just to keep him upright.

The trick to finding the right ergonomic babywearing positions is remembering that the fabric should do most of the heavy lifting, not the baby’s joints. If you’re using a wrap, keep it snug enough that they don’t slump, but not so tight you’re worried about their breathing. When I was dealing with my newborn, the “tightness” felt like a constant negotiation between safety and comfort. Just aim for that seated, curled-up look, and if their legs are splayed wide or dangling, stop and readjust.

Safe Babywearing for Newborns and Respecting Weight Limits

When you’re dealing with a newborn, the physics of babywearing change completely. The manual will give you a specific number for baby carrier weight limits, but that’s the least of your worries when they’re only six weeks old. At that age, they don’t have any neck strength, which means they aren’t just “sitting” in the carrier; they are essentially a heavy, floppy weight that you are trying to manage while your own muscles are screaming. I remember with my eldest, I thought I had the tension perfect, only to realize ten minutes later that his chin was tucked right against his chest.

The trick to safe babywearing for newborns isn’t just about following a checklist; it’s about constant, tactile reassessment. You can’t just set the carrier and walk away to make a cup of tea. Because they are so small, the risk of preventing airway obstruction in carriers becomes much more hands-on. You need to be able to reach in and feel that their chin is up, away from their chest, at all times. If they feel like they’re sliding down or curling inward, the carrier isn’t doing its job, regardless of what the box says.

Five things I wish I’d known before I started buckling myself into a harness at 3:00 AM

  • Check the chin, not just the straps. When my second was about four months old, I learned the hard way that even if the carrier looks perfect, a baby’s heavy head can slump forward if they’re too relaxed. If you can’t see their nose or if their chin is tucked into their chest, they aren’t safe. You need to adjust the fabric immediately—don’t wait for them to wake up.
  • The “Two-Finger Rule” is a lie for some, but a lifeline for others. The manuals say you should be able to fit two fingers between the carrier and the baby’s chest to ensure they can breathe, but in reality, if you’re using a structured carrier with a newborn, you want that fabric snug enough that they don’t slide down, but loose enough that you can feel their rise and fall with your own hand.
  • Watch the “slump” as they get heavier. Around the six-month mark, when they start getting some real weight behind them, the physics change. A carrier that felt secure with a tiny newborn can suddenly feel like it’s pulling your shoulders out of their sockets or, worse, letting the baby’s weight sag too low. If you feel your own posture shifting or the baby’s hips dropping, it’s time to tighten the waist belt or switch to a different style.
  • Don’t trust the “one size fits all” label. I remember thinking a high-end wrap would work for all four of mine, but what worked for my first at two months was a total nightmare for my third at five months because their neck strength was different. Always re-evaluate the tension and the position every time the baby hits a new developmental milestone.
  • Use the “Mirror Test” when you’re too tired to think. When you’re running on three hours of sleep and just need to get out the door, don’t rely on your gut feeling—your gut is tired and unreliable. Stop in front of a full-length mirror. If the baby’s legs aren’t in that ‘M’ shape (knees higher than the bum) or if their airway looks even slightly crowded, fix it before you step foot outside.

The Essentials When You’re Too Tired to Read the Manual

Prioritise the airway over perfection; if the baby’s chin is tucked into their chest or they look like they’re struggling to breathe, stop, unclip, and reset, even if it means a meltdown.

Trust the TICKS rule as your baseline, but remember that “safe” doesn’t mean “easy”—it just means you’ve checked that their chin is up and their hips are wide.

Know when to put the carrier down; if your own exhaustion is making you clumsy or too distracted to notice a positional shift, it is safer to use a pram or a cot for a while.

Finding Your Rhythm

At the end of the day, safety isn’t about achieving a photographic perfection of the TICKS rules every single time you clip that buckle. It’s about the fundamental checks: is their chin up, is their airway clear, and are they positioned so you can actually feel them breathing? When you’re navigating a grocery shop with a teething six-month-old or trying to soothe a newborn during a bout of colic, the manual can feel like a heavy weight. But if you keep that core focus on the airway and ensure their hips are set right, you’ve already done the most important work. You don’t need to be a professional babywearer; you just need to be a parent who is paying attention to the cues of the tiny human strapped to your chest.

I remember my second child, who decided that any attempt at babywearing was a personal affront to his dignity. I spent weeks feeling like I was doing everything wrong because I couldn’t get him to settle in the carrier. But here is the truth I learned through many long, weary walks: the gear is just a tool, not a measure of your competence. There will be days when the carrier is your lifeline and days when it’s just another thing to trip over. Give yourself some grace. You are learning a new skill while simultaneously managing a life that is often exhausting and unpredictable. You’re doing much better than you think you are.

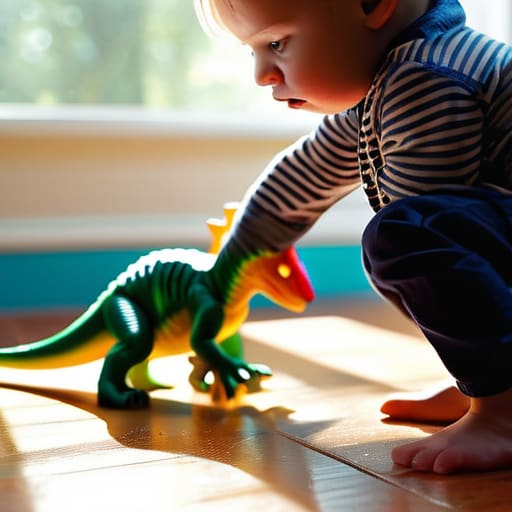
How to handle sharing and turn taking.
Toddlers Cannot Share Yet, and That Is Normal

I once sat in a pediatric ward with a mother who was weeping because her two-year-old wouldn’t “collaborate” with a playmate, as if she were trying to manage a corporate merger rather than a toddler in a playroom. The parenting books make it sound so clinical, like you just need to implement a structured rotation system to foster social development. But they don’t tell you about the primal screeching that occurs when you try to explain the concept of “your turn” to a child who, at eighteen months old, genuinely believes that every object in the room is an extension of their own physical body. If you are currently Googling how to handle sharing and turn taking while hiding in the pantry to avoid a meltdown, I want you to know that you aren’t failing; you’re just dealing with a tiny human who lacks a fully formed prefrontal cortex.

I’m not going to give you any more of that polished, theoretical nonsense. Instead, I’m going to tell you what actually works—and what causes a total domestic collapse—based on eleven years of nursing and four children of my own. I will give you the biological reality of why they fight, the specific ages when “sharing” actually becomes a possibility, and the exact moment you should stop trying to teach a lesson and just walk away.

Table of Contents

Understanding How to Handle Sharing and Turn Taking

Understanding How to Handle Sharing and Turn Taking.

If you look at any textbook on toddler social skills development, you’ll find a neat little diagram suggesting that children gradually learn to understand that others have feelings too. It makes sense on paper. But when you’re standing in the middle of a living room floor, watching two three-year-olds engage in a high-stakes tug-of-war over a single, slightly chewed plastic dinosaur, those diagrams feel a bit insulting. At that age, the concept of “mine” isn’t just a phase; it is a fundamental biological imperative. To a two-year-old, giving up a toy feels less like a social grace and more like a loss of personal identity.

The reality is that we are asking children to master complex emotional regulation before their prefrontal cortex has even finished its morning coffee. When I was working on the ward, I saw how much easier things were when we didn’t force the “fairness” too early. In my own house, I’ve learned that managing sibling rivalry over toys isn’t about enforcing a strict timer; it’s about acknowledging that the meltdown is a legitimate response to a perceived injustice. You aren’t failing because they can’t share; you’re just witnessing the gap between biological readiness and social expectation.

Key Things to Know

Key Things to Know: developmental sharing milestones.

First, we need to talk about the gap between the textbook and the living room floor. When you look at the official charts for developmental milestones for sharing, they make it sound like a switch flips. One day they’re a solitary little island, and the next, they’re suddenly ready to engage in polite, reciprocal play. In reality, it’s a messy, non-linear crawl. My second, Leo, was about three before he even understood that another person could have a different desire for the same blue truck. Before that age, “sharing” is often just a polite word for temporary surrender under duress.

You also have to accept that managing sibling rivalry over toys is less about teaching a moral lesson and more about managing a crisis. You can try all the cooperative play strategies in the book, but when you have two toddlers in a high-stakes standoff over a single plastic dinosaur, the “lesson” usually goes out the window. I’ve learned that trying to force a sense of fairness too early often just leads to more resentment. Sometimes, the most effective tool isn’t a lecture on empathy; it’s simply having a duplicate of the high-value item within arm’s reach.

Practical Tips and Steps

Practical Tips and Steps for sharing toys.

First, we need to ditch the idea that “sharing” is a single, unified skill. When I was nursing on the ward, I saw kids who could play beautifully alongside each other but would absolutely lose their minds if a peer touched their teddy. For a two-year-old, “sharing” often feels like being told they have to give away a limb. Instead of demanding they hand over a toy, try using a timer. Tell them, “Leo has the truck for three minutes, then it’s your turn.” It gives them a concrete end-point. When my second child was about two and a half, this was the only way we managed managing sibling rivalry over toys without someone ending up in a corner crying.

Second, focus on cooperative play strategies rather than just policing the conflict. If you see two toddlers eyeing the same bucket, don’t just wait for the scream; step in and suggest a shared task, like “Can you both help me build this tower?” You aren’t just stopping a fight; you are slowly teaching empathy to preschoolers by showing them that playing together can actually be more fun than guarding a plastic shovel alone. It won’t work every time—some days they just want to be alone with their stuff—and that’s perfectly fine.

Common Mistakes to Avoid

The biggest mistake I see—and I did it myself with my second—is the “forced sharing” trap. You see two kids fighting over a truck and you step in, snatch the toy, and say, “Give it to him, it’s his turn.” On paper, you’re teaching cooperation; in reality, you’re just teaching that might makes right and that their possessions aren’t actually theirs. When you force a child to hand over something they are mid-use with, you aren’t building toddler social skills development; you’re just creating a tiny, resentful rebel. I learned the hard way with my three-year-old that if they are deeply engaged in a task, let them finish. The world won’t end if the other child waits three more minutes.

Another pitfall is treating every single squabble as a high-stakes lesson in conflict resolution for kids. There is a massive difference between a child being genuinely unkind and two toddlers simply having a disagreement about who gets the blue shovel. If you jump into every minor spat with a lecture on empathy, you’ll find yourself exhausted and, frankly, a bit patronizing. Sometimes, the best thing you can do is sit back and let them navigate the friction. Most of the time, they’ll figure it out, and you’ll save your energy for the actual meltdowns.

Final Thoughts

If you’re sitting on the floor right now, surrounded by plastic building blocks and feeling like you’re failing because your two-year-old just bit their sibling over a blue car, please take a breath. The textbooks make toddler social skills development sound like a linear progression of polite exchanges, but in my house, it’s more like a series of small, loud negotiations. You aren’t doing anything wrong when the “cooperative play strategies” you read about in a parenting magazine fall apart the moment actual humans get involved.

There is no magic switch that flips where a child suddenly understands the concept of a temporal delay. Whether you are managing sibling rivalry over toys or trying to help a preschooler navigate a playground, remember that these outbursts are often just a symptom of a brain that hasn’t quite finished its wiring. My youngest, who is now five, didn’t grasp the concept of a “timer” until he was nearly four; before that, a three-minute wait felt like a lifetime of injustice. Be patient with them, but more importantly, be patient with yourself. It’s a long game, and most days, just getting through to bedtime without a permanent grudge is a win.

Five ways to survive the battle for the blue truck

  • Stop using the word “share” with anyone under three. To a two-year-old, “sharing” sounds suspiciously like “giving your favorite thing to someone else forever.” Instead, use “taking turns.” When my second child was twenty-two months, I realized that telling him to share his blocks was a recipe for a screaming match; telling him “it’s Mummy’s turn for one minute, then it’s yours” gave him an end date, and that’s the only thing that keeps the panic at bay.
  • Use a timer, but don’t expect it to be a magic wand. The clinical advice says timers provide a visual cue for transitions, and it does work—eventually. But when you’re dealing with a four-year-old who has decided that the timer is a personal insult to their autonomy, you’ll find yourself sitting on the floor, timer in hand, negotiating like a hostage mediator. It works, but it’s rarely graceful.
  • The “Special Toy” Clause. If you try to force a child to share their absolute most prized possession—the one they sleep with, the one they’ve had since they were six months old—you aren’t teaching social skills, you’re just testing their breaking point. I learned this the hard way with my eldest at age three; we decided that “special toys” stay in a basket during playdates. It saves everyone’s sanity.
  • Narrate the struggle instead of fixing it immediately. When I was on the ward, I’d see parents jump in the second a conflict started, trying to force a “sorry” that wasn’t felt. Instead, try saying, “You’re really frustrated because Leo has the truck right now.” It doesn’t stop the crying, but it acknowledges the reality. At eighteen months, they can’t regulate their emotions, so the least we can do is witness them without making it a lecture.
  • Accept the inevitable “unreasonable” meltdown. There will be days when the concept of “next” simply doesn’t compute, usually because they’re tired, hungry, or just having a Tuesday. The textbooks say to remain calm and consistent, which is great advice until you’re the one being yelled at by a tiny human over a plastic dinosaur. On those days, sometimes the best “tip” is to just move the toys to another room and try again when the cortisol levels have dropped.

The Real-World Cheat Sheet

Forget the idea that a two-year-old understands “fairness”; at that age, they are biologically wired to believe that if they can see a toy, it belongs to them, so don’t expect a lecture on social justice to work when they’re mid-tantrum.

Use a timer, not a plea; when my second child was three, telling him “five more minutes” meant nothing, but seeing the red numbers on the kitchen timer counting down gave him a concrete reality he could actually grasp.

If everyone is exhausted and the “sharing” session has devolved into a screaming match, walk away—sometimes the best parenting move isn’t teaching a lesson, it’s just preventing a meltdown from becoming a core memory.

The Long Game of Letting Go

If you try to apply all of this at once, you’re going to end up exhausted and likely shouting over a pile of discarded Lego. Remember that the clinical goal is social development, but the reality is that a two-year-old doesn’t actually have the cognitive hardware to understand “delayed gratification”—to them, if they aren’t holding the truck, the truck doesn’t exist. You’ll have days where you successfully model turn-taking, and days where you end up just buying a second, identical toy because the meltdown was too much for a Tuesday afternoon. Focus on the small wins: the moment at age three when they actually wait for ten seconds without a scream, or when they realize a toy can be returned. It isn’t about perfect behavior; it’s about consistent, gentle scaffolding through the chaos.

Please, don’t let a failed afternoon of “sharing” convince you that you’re doing something wrong. I’ve seen parents who read every parenting book on the shelf crumble because their toddler decided that “my turn” was a permanent state of being, and I’ve seen my own kids turn a simple game into a battlefield. This is a skill that is built in increments, often through trial, error, and a fair amount of frustration. You aren’t just teaching them to hand over a ball; you are teaching them how to exist in a world with other people. It’s messy, it’s loud, and it’s incredibly slow, but you’re doing the heavy lifting, even on the days it feels like you’re losing.

Tips on how to build a bedtime routine.
A Bedtime Routine That Survives Real Evenings

If you spend ten minutes on Pinterest, you’ll be convinced that learning how to build a bedtime routine requires a $200 weighted blanket, a dimmable Himalayan salt lamp, and a series of choreographed sensory activities that look more like a yoga retreat than a Tuesday night. The “experts” make it sound like a delicate science, something you can master if you just buy the right linen pajamas and follow a strict 7:00 PM countdown. But let me tell you what they don’t mention: they don’t mention the three-year-old who decides, mid-story, that they have a sudden, life-threatening need for a glass of lukewarm water, or the toddler who views a consistent schedule as a personal insult.

I’m not here to sell you on a lifestyle aesthetic or a checklist of expensive gadgets. I want to talk about what actually works when you’re exhausted and the house is falling apart. I’ll give you the clinical reality of sleep cycles, but I’ll also give you the unfiltered truth of what happens when your child decides to test every boundary you’ve set. We’re going to look at the evidence, the failure modes, and how to find a rhythm that actually survives the reality of a real, messy household.

Table of Contents

The Textbook Guide on How to Build a Bedtime Routine

The Textbook Guide on How to Build a Bedtime Routine.

If you open any standard parenting manual or clinical pamphlet, the advice is remarkably tidy. They’ll talk to you about circadian rhythm regulation as if it’s a simple dial you can just turn down. The textbook approach suggests a strict sequence: dim the lights, eliminate screens to encourage melatonin production naturally, and implement a predictable set of evening relaxation techniques. It’s all very logical, centered on the idea that if you control the environment, you control the outcome.

The goal, according to the literature, is to establish consistent sleep hygiene practices that signal to the brain that the day is over. You’re told to create a “sensory bridge” from the chaos of playtime to the stillness of sleep. On paper, it’s a foolproof blueprint for improving sleep quality. It suggests that by removing blue light and lowering the temperature, you are essentially setting a biological trap for sleep. It sounds effortless—a clean, linear progression from bath time to dreamland that works every single time. Of course, as anyone who has been trapped in a darkened room by a screaming three-year-old knows, the textbook rarely accounts for the human element.

Circadian Rhythm Regulation vs the Reality of Midnight Chaos

Circadian Rhythm Regulation vs the Reality of Midnight Chaos

The science books will tell you that circadian rhythm regulation is all about light and consistency. They’ll explain how dimming the lights helps melatonin production naturally, signaling to the brain that the day is done. It sounds perfectly logical—a clean, biological clock winding down in a predictable sequence. When my eldest was eighteen months old, I actually believed this. I had the dimmers installed, the white noise machine set, and a strict “no screens” rule that I guarded like a hawk.

But science doesn’t account for the sheer, unbridled chaos of a toddler who has decided that 11:00 PM is the optimal time for a philosophical debate about why they can’t wear their dinosaur pajamas to bed. You can implement all the best sleep hygiene practices in the world, but they tend to evaporate the moment a child develops a sudden, frantic need for a third glass of water or a very specific, slightly damp teddy bear. In those moments, you aren’t managing a biological rhythm; you are negotiating with a tiny, exhausted terrorist who has zero interest in your carefully curated evening relaxation techniques.

Why Sleep Hygiene Practices Often Fail in Real Life

Why Sleep Hygiene Practices Often Fail in Real Life

The problem with most sleep hygiene practices is that they assume a level of domestic cooperation that simply doesn’t exist. The literature talks about a “digital detox before bed” as if you can just flip a switch and turn off the stimulation. But they don’t account for the fact that you’re often trying to implement this while simultaneously heating up a lukewarm pasta dish, hunting for a lost specific stuffed elephant, and negotiating with a three-year-old who has suddenly decided that socks are a violation of their human rights. You can’t exactly facilitate evening relaxation techniques when the house feels like a combat zone.

Then there is the issue of biological reality versus parental willpower. We know that light exposure affects melatonin production naturally, so we dim the lights and try to create a sanctuary. But when you have a toddler who has discovered that a sudden burst of energy at 7:30 PM is their new superpower, all the dim lighting in the world won’t stop the chaos. I remember with my second, around eighteen months, I tried to follow every rule in the book, only to find that consistency is often the first casualty of a teething bout or a sudden developmental leap. Sometimes, the “perfect” routine is just a theoretical concept that falls apart the moment a real child enters the room.

Evening Relaxation Techniques That Actually Work at 2 Am

When you’re staring at a red-eyed three-year-old who has suddenly decided that the concept of sleep is a direct affront to their dignity, the textbook advice about “dimming the lights” feels incredibly hollow. Most evening relaxation techniques you read about assume a level of cooperation that simply doesn’t exist in the middle of a developmental leap. At 2 AM, I wasn’t looking for a structured meditation session; I was looking for anything that would lower the cortisol levels in the room. For my second, it wasn’t about a formal ritual, but rather low-sensory connection—sitting on the floor in the dark, no talking, just being a physical presence until the frantic energy finally ebbed away.

The goal isn’t perfection; it’s about improving sleep quality by lowering the stakes. If you try to force a strict digital detox before bed when the child is already hyper, you’re just adding another battle to the list. Instead, I found that heavy work—like “tucking them in” with firm, rhythmic pressure or even a very boring, whispered story—worked better than any scented candle. It’s about moving from the chaos of the day into a state of physical heaviness that tells their nervous system the fight is over.

A Digital Detox Before Bed and Its Messy Consequences

The clinical literature is very clear about this: blue light suppresses melatonin production naturally, making it harder for a child’s brain to signal that the day is over. They call it a digital detox before bed, and on paper, it sounds like a simple swap of an iPad for a picture book. But they don’t mention the sheer, unadulterated drama that ensues when you take away the only thing keeping a four-year-old quiet while you’re trying to finish the dishes. When I tried the “no screens after 6 PM” rule with my second, it didn’t lead to better sleep; it led to a level of negotiation and tearful protest that made me want to hide in the pantry with a bag of crisps.

In practice, most of us aren’t looking for perfection; we’re looking for survival. If a twenty-minute cartoon is the only way you can get a toddler to sit still long enough to actually transition into a calm state, then forgive yourself. The goal is improving sleep quality over the long haul, not winning a battle of wills every single night. Sometimes, the best part of your evening relaxation techniques is simply knowing when to call a truce.

Improving Sleep Quality Without Losing Your Absolute Mind

When we talk about improving sleep quality, the professional literature tends to focus on the environment—dim lights, cool temperatures, white noise. And look, that stuff matters. I learned that on the ward, where a bright hallway light can ruin a child’s recovery. But when you’re standing in a dark hallway at 3:00 AM with a teething ten-month-old who thinks your presence is a debatable concept, “optimal room temperature” feels like a cruel joke. You aren’t looking for a clinical setting; you’re looking for a way to stop the spiral.

The secret isn’t a perfect setup; it’s managing your own physiological response so you don’t pass the panic onto them. If you are vibrating with cortisol, they will too. I found that with my second, who was a particularly sensitive sleeper at eighteen months, the most effective way to encourage melatonin production naturally wasn’t a fancy gadget, but lowering my own heart rate before I even entered their room. It sounds hippy-dippy, but it’s basic biology. If you approach the bed like you’re heading into a combat zone, your child will treat the bedtime routine like a battlefield.

Five things the manuals miss about making a routine actually stick

  • Stop aiming for a rigid schedule and start aiming for a predictable sequence. The textbooks love saying “bedtime is at 7:00 PM,” but when my second child was eighteen months old, 7:00 PM was less a time and more a suggestion that he took as a personal challenge. What actually worked was the order: bath, then book, then song. Even if the bath happened at 6:30 or 8:00, the sequence told his brain the sleep train was pulling into the station.
  • Accept that the “calm environment” is a lie during the transition. They tell you to dim the lights and keep things quiet, but for a three-year-old, a quiet room can feel like a sensory vacuum they feel compelled to fill with screaming. I learned with my third that sometimes a little “low-stakes noise”—a white noise machine or even just the hum of the dishwasher in the next room—is more effective at settling them than a tomb-like silence that makes every floorboard creak sound like a jump scare.
  • Build in a “buffer zone” for the inevitable negotiations. If you try to move straight from high-energy play to tucked-in-and-eyes-closed, you will lose. I started giving my oldest a ten-minute warning when he was four; not a “five minutes left” (which means nothing to a child) but a physical transition, like “one more Lego build, then we move to the bathroom.” You need that bridge between the chaos of the day and the stillness of the night.
  • Don’t fight the “sleep onset” battle every single night. There will be days when the routine is followed to the letter and they still lie there staring at the ceiling for two hours. I’ve seen it on the ward and I’ve lived it at home. If you try to force the “perfect” routine every time they resist, you turn bedtime into a power struggle. Sometimes, the most successful thing you can do is acknowledge it’s a bad night, do the bare minimum, and try again tomorrow.
  • Check the “physical basics” before you tackle the psychological ones. Before you spend forty minutes reading a story to soothe a restless toddler, check the temperature of the room and the state of their nappies or underwear. When my fourth was a baby, I spent ages worrying about “sleep associations,” only to realize the room was just slightly too chilly for them to settle. If the body isn’t comfortable, no amount of rhythmic chanting or lavender oil is going to bridge that gap.

The Short Version for When You’re Too Tired to Read

Forget the perfect schedule; aim for a predictable sequence. The textbooks love a rigid 7:00 PM start, but by the time my second child was eighteen months old, I learned that a “routine” is just a series of cues—bath, book, bed—that tells their brain the day is ending, even if it happens at 7:15 one night and 8:00 the next.

Distinguish between a “bad habit” and a developmental leap. When my three-year-old suddenly decided that sleeping in her own bed was an affront to her dignity, it wasn’t because my sleep hygiene had failed; it was because her brain was growing. Don’t scrap everything you’ve built just because a new phase has arrived.

Prioritise your own sanity over clinical perfection. If a “digital detox” is causing a meltdown that lasts two hours, put the tablet away and just get through the night. A calm parent is worth more to a child’s sleep than a perfectly executed, gadget-free environment.

The Long Game

If you take anything away from this, let it be that a bedtime routine isn’t a rigid contract you sign with your child; it’s more of a flexible framework that will inevitably crack under the pressure of a teething toddler or a sudden fever. We’ve looked at the science of circadian rhythms and the theory of digital detoxes, but as I learned with my second child when he was eighteen months old, the textbook goes out the window the moment a meltdown begins. You can aim for the perfect sequence of dim lights and calming stories, but when the reality of midnight chaos hits, your only real job is to keep things steady and safe. Some nights you will follow the plan, and some nights you will simply be surviving, and both are perfectly acceptable.

Please, stop measuring your worth as a parent by the consistency of your child’s sleep schedule. I spent a decade in paediatric nursing watching parents crumble under the weight of “perfect” sleep hygiene, and I can tell you that the most important thing you can provide isn’t a flawless routine, but a calm presence. When you finally stop fighting the chaos and start working with the reality of your specific, messy, beautiful children, the pressure lifts. You aren’t failing because the routine broke; you’re just parenting. Give yourself the same grace you would give any other tired parent sitting in a hospital waiting room at 3:00 AM.

How to choose toys that get used.
Toy Rotation Beats Buying More

I spent a small fortune on a musical, light-up, singing jungle gym for my second child, convinced it was the pinnacle of cognitive development. For exactly twelve minutes, it was the star of the living room; by day three, it was a glorified, battery-operated obstacle course that my toddler used to launch himself toward the coffee table. We’ve all been there, staring at a pile of expensive plastic clutter and wondering how to choose toys that get used instead of just things that take up floor space and drive us mad. The truth is, most of the “educational” marketing is designed to trigger our guilt, not to actually engage a child’s curiosity.

In this post, I’m skipping the glossy brochures and the developmental jargon. I want to talk about what actually works when you’re standing in a toy aisle at 7pm with a screaming toddler in the trolley. I’ll give you the practical, unvarnished reality of open-ended play versus the flashy gadgets that die within a week. I won’t pretend every toy is a miracle, but I can tell you which ones actually survive the transition from novelty to necessity in a busy, chaotic house.

Table of Contents

The Toy Trap Why Educational Plastic Usually Ends Up Forgotten

The Toy Trap Why Educational Plastic Usually Ends Up Forgotten.

I’ve spent enough time in paediatric wards to see how kids interact with the world, and I’ve spent enough time in my own living room to see how they interact with a pile of brightly coloured, battery-operated chaos. There is a specific kind of heartbreak in seeing a £50 “smart” toy—the kind that sings, flashes, and promises to teach your two-year-old the alphabet—end up under the sofa within forty-eight hours. These gadgets are designed to do the work for the child, which is exactly why they fail. They offer a closed loop of stimulation: press a button, hear a sound, repeat. It’s passive. It’s boring.

The real magic happens when you lean into open-ended play benefits. When my second child was eighteen months, I realised that a set of plain wooden blocks or even just a few sturdy Tupperware containers provided more engagement than any flashing plastic gadget ever could. These items don’t tell the child what to do; they wait for the child to decide. By focusing on developmentally appropriate play rather than shiny distractions, you aren’t just minimizing toy clutter; you’re actually giving them the tools to build their own worlds.

Developmentally Appropriate Play vs the Midnight Meltdown Reality

Developmentally Appropriate Play vs the Midnight Meltdown Reality

In the nursing wards, we talked a lot about “developmentally appropriate play”—the idea that a toy should perfectly match a child’s current cognitive milestone. On paper, it’s beautiful. In practice, it’s often a recipe for a meltdown. You buy this sophisticated, Montessori inspired toy designed to teach fine motor skills, only to watch your two-year-old use it as a projectile or, more likely, ignore it entirely in favour of the cardboard box it came in. The gap between what a child should be doing and what they actually want to do is where most of our frustration lives.

The truth is that real childhood play engagement isn’t a linear progression of skill acquisition; it’s often chaotic, repetitive, and occasionally destructive. When I was dealing with my second, the “correct” toys were usually the ones that could be gripped, thrown, or chewed without me fearing a trip to A&E. If you want to avoid the clutter, look for things that allow for open-ended play benefits—toys that don’t have just one “correct” way to be used. If a toy only does one thing when you press a button, it has a very short shelf life in a real house.

How to Choose Toys That Get Used Without the Guilt

How to Choose Toys That Get Used Without the Guilt

If you want to stop the cycle of buying things that just collect dust, you have to stop looking for “the best toy” and start looking for the best tools. When my second child was about eighteen months, I spent a small fortune on a massive, multi-sensory activity center that promised endless stimulation. It lasted exactly four days before it became a very expensive obstacle for him to trip over in the hallway. The lesson I learned—the hard way—is that open-ended play benefits far outweigh anything that only does one specific thing. A wooden block can be a car, a phone, or a piece of cheese; a plastic singing elephant can only ever be a singing elephant.

The secret to minimizing toy clutter isn’t about having less; it’s about having better. I’ve found that a simple toy rotation system works wonders. Instead of having every single thing out on the floor at once—which, let’s be honest, is a recipe for a sensory meltdown—keep a small selection accessible and tuck the rest in a cupboard. When my eldest was three, we’d swap out a few items every Sunday night. It makes the “old” toys feel brand new again, and it saves your sanity by making the cleanup process actually manageable.

Open Ended Play Benefits Why Simpler Is Often Much Better

The thing about those high-tech, singing plastic blocks is that they do all the work for the child. You press a button, it flashes, it makes a noise, and the child sits there like a spectator at a football match. It’s passive. When I was working on the ward, I saw how quickly kids tuned out predictable stimuli; they just stop engaging because there’s no mystery left. This is where the real open-ended play benefits kick in. When you give a child something that doesn’t have a “correct” way to work—like a set of wooden blocks, some silk scarves, or even just a collection of sturdy cardboard boxes—you are handing them the steering wheel. They aren’t just consuming entertainment; they are inventing it.

I remember my second, Leo, at about eighteen months. We had this expensive, light-up activity center that he treated like a piece of furniture. But the moment we introduced a simple set of nesting cups, he was obsessed for three days straight. That’s the magic of Montessori inspired toys or even just basic household items: they require active cognition. They force the brain to problem-solve, to stack, to fail, and to try again. It’s much harder to achieve that level of childhood play engagement when the toy is busy doing the thinking for them.

Montessori Inspired Toys Hype Truth and Sustainable Toy Selection

If you’ve spent more than five minutes on Instagram lately, you’ve seen them: the muted, aesthetic, wooden rainbow sets and the minimalist wooden blocks that look more like high-end sculpture than something a toddler would actually touch. Montessori inspired toys have become the gold standard for the “intentional parent,” and while there is some genuine truth to the idea that simple, tactile materials encourage focus, we need to strip away the marketing veneer. The truth is that a child doesn’t need a $60 hand-carved maple ring to learn about gravity; they need something that doesn’t break the moment they decide to test its structural integrity against the floor.

The real value isn’t in the price tag or the wood grain, but in how these items facilitate open-ended play benefits. When you move away from the “this button does this” gadgets, you’re actually making a much more sustainable toy selection because these pieces don’t have an expiry date. My second child, when he was about eighteen months, would spend forty minutes with a single set of plain wooden blocks, whereas the flashy, musical “learning center” sat in the corner gathering dust. The goal isn’t to curate a museum; it’s to find tools that let them lead the way.

Minimizing Toy Clutter Through Practical Toy Rotation Systems for Toddlers

If you’ve ever walked into a living room that looks like a Lego factory exploded, you know the feeling. It isn’t just the mess; it’s the mental weight of it. When everything is out at once, nothing is special. My second child, Leo, was about eighteen months when I finally stopped fighting the tide and started toy rotation systems for toddlers. Instead of having every single block, truck, and puzzle accessible, I pulled most of them into a plastic tub in the garage or the top of a high cupboard. I left only five or six items on the floor.

The trick isn’t just about minimizing toy clutter to save your sanity; it’s about reclaiming their attention. When I brought back a “new” set of wooden blocks after three weeks, Leo reacted like I’d just handed him a bar of solid gold. By limiting the options, you actually increase their childhood play engagement. You aren’t depriving them; you’re giving them the space to actually focus on one thing without the visual noise of twenty other distractions screaming for attention from the corner.

Five Rules for Buying Toys That Won't Just Become Expensive Dust-Collectors

  • Look for the “open-ended” factor. When my second child was eighteen months, I bought this massive, expensive electronic tiger that roared and played music when you pressed its paw; it was a hit for exactly twelve minutes before it became a permanent fixture on the floor. Contrast that with a set of plain wooden blocks—the same kid played with those for three years, turning them into towers, garages, and eventually, projectiles. If the toy only does one thing, it has a very short shelf life.
  • Test the “boredom threshold.” Before you tap ‘buy’ on that flashy gadget, ask yourself: what happens when the novelty wears off? A good toy is one that evolves as the child does. A simple set of measuring cups might be a sensory experience for a ten-month-old, a tool for “cooking” at age two, and a way to practice fractions at age six. If the toy’s only function is to entertain, it’s a ticking clock.
  • Prioritize the “low-friction” rule. If a toy requires three different types of batteries, a specific mounting bracket, or a complex assembly process that leaves you sweating in the hallway at 7:00 AM, it’s going to stay in the box. I learned this the hard way with my third; we had a beautiful, complex activity center that was so difficult to set up that I eventually just moved it into the garage. If it’s not easy to get out and play with, it’s not a toy; it’s furniture.
  • Follow the child, not the box. The packaging will tell you a toy is for “fine motor skills” or “cognitive development,” but the child will tell you what they actually want. I’ve seen toddlers ignore a £50 “educational” tablet to spend forty minutes intensely engaged with a cardboard delivery box and a roll of masking tape. Don’t fight the impulse; if they are obsessed with something “unproductive,” it’s usually because it’s giving them the kind of agency they actually crave.
  • Check the “destruction potential” vs. “repairability.” We often try to buy the “nicest” thing, thinking quality equals longevity. But in a house with four kids, “quality” also means “can I fix this when it gets stepped on or thrown during a tantrum?” If it’s a delicate piece of art, it’s a museum piece, not a toy. Aim for things that are sturdy enough to survive a fall, but simple enough that you aren’t constantly playing “damage control” every time they have a meltdown.

The Short Version (For When You're Too Tired to Read)

Stop buying the “magic” gadgets; if it has a flashing light and a specific song, your child will likely master it in ten minutes and then treat it like a piece of junk by Tuesday.

Look for “open-ended” pieces—blocks, silks, or even just a sturdy cardboard box—because a toy that can be ten different things is much more useful than one that only does one thing.

Don’t feel guilty about the clutter, but do use rotation; when my second child was eighteen months, we stopped trying to manage the whole pile and just put out three things at a time, which saved my sanity and actually kept him playing longer.

The Bottom Line (And a Bit of Sanity)

If you take anything away from this, let it be that you don’t need a house full of flashing lights and expensive “learning” gadgets to raise a bright, capable kid. We’ve looked at why the plastic clutter usually fails, why simplicity beats complexity, and how a bit of rotation can save your floor space. At the end of the day, the best toys are the ones that don’t do the work for them, but rather invite them to do the work themselves. Whether it’s a set of wooden blocks for a two-year-old or a box of old kitchen Tupperware for a toddler, the goal is engagement over stimulation. Stop trying to buy the “perfect” developmental milestone and start looking for the things that actually survive the midnight meltdown reality.

I remember when my eldest was about eighteen months, I spent a small fortune on a “musical activity station” that promised to develop fine motor skills. It lasted exactly three days before it became a very expensive obstacle for him to trip over in the dark. He went back to a cardboard box and a wooden spoon, and honestly, he was more focused there than he ever was on the gadget. Please, give yourself permission to stop chasing the perfect toy list. Your children don’t need a curated museum of educational excellence; they just need tools to explore their world and, more importantly, a parent who isn’t too stressed about the toy bin to actually sit on the floor and play with them.

How to dress a baby for the temperature.
Dressing a Baby for the Room, Not the Weather Outside

I remember standing in the middle of a drafty nursery during my first year of fatherhood, staring at a mountain of expensive, organic, multi-layered merino wool sets that promised to keep my eldest warm, only to realize I was actually just building a tiny, expensive cocoon. The parenting magazines make it sound like a science experiment, complete with complicated charts and high-tech fabrics, but they never quite capture the sheer panic of wondering if you’ve overdone it or if your child is currently shivering under three layers of cotton. When you’re trying to figure out how to dress a baby for the temperature, the gap between the clinical advice and the reality of a squirming, sweaty infant is vast.

I’m not here to sell you on a specific brand of thermal bodysuit or a complicated layering system that takes twenty minutes to put on. Instead, I’m going to give you the practical, unvarnished truth based on eleven years of nursing and four children who have all had very different reactions to the cold. I’ll tell you which temperature markers actually matter, how to check for warmth without waking a sleeping newborn, and—most importantly—when to ignore the textbook and just trust your gut.

Table of Contents

The Textbook Rule vs the 3 Am Reality of How to Dress a Baby for the Temper

The Textbook Rule vs the 3 Am Reality of How to Dress a Baby for the Temper

The medical textbooks and the NHS leaflets are wonderfully consistent: they’ll tell you to aim for a room temperature between 16 and 20 degrees Celsius and suggest a specific number of layers based on a neat little chart. They make it sound like a simple math problem. But the textbooks don’t account for the fact that a newborn isn’t a static object; they are a wriggling, heat-radiating, unpredictable little person. When I was on the ward, I saw parents following the “rules” to the letter, only to realize they’d inadvertently created a little oven because the child was tucked under a heavy duvet in a room that felt “just right” to an adult.

In practice, the real trick isn’t following a chart, but learning how to check baby temperature without a thermometer. When my second child was four months old, I spent an entire winter terrified of the cold, piling on every bit of cotton I owned. I learned the hard way that if their chest or the back of their neck feels hot or sweaty, you’ve gone too far. You aren’t looking for “warm”; you are looking for comfortable. It’s a fine line between a cozy infant and the frantic, midnight realization that you’ve ignored the signs of overheating.

Mastering Infant Clothing Layers for Winter Without the Frantic Shivering

Mastering Infant Clothing Layers for Winter Without the Frantic Shivering

When I was on the ward, we had a clinical way of checking for thermal comfort, but when you’re at home with a sleeping toddler, you don’t have a thermometer and a medical chart. The trick to managing infant clothing layers for winter isn’t about following a strict mathematical formula; it’s about the touch test. Forget the tiny, damp toes—that’s where the textbooks get it wrong. Instead, feel the back of their neck or their chest. If that skin feels clammy or hot, you’ve gone too far. If it feels cool but the chest is warm, you’ve hit the sweet spot.

I learned this the hard way with my second, who I had bundled into so many layers during a January cold snap that he woke up sweating and inconsolable. To avoid that, I now rely heavily on a baby sleep sack tog guide rather than just adding more jumpers. A higher tog rating in a sleep sack is much safer and more effective than layering multiple loose garments that can bunch up. It provides consistent warmth without the frantic, mid-sleep struggle of trying to adjust a tiny bodysuit while they’re mid-tantrum.

The Truth About Nursery Thermostat Settings for Newborns and Sleeping Safel

The Truth About Nursery Thermostat Settings for Newborns and Sleeping Safel

The clinical guidelines are very clear: keep the room between 16 and 20 degrees Celsius. It sounds simple enough on a printed sheet, but when you’re standing in a dark room at midnight, staring at a sleeping newborn, that range feels incredibly narrow. You find yourself hovering over the heating controls, terrified that a slight breeze from the window will turn the nursery into a fridge, or that a radiator left on too high will cook them. The truth is, nursery thermostat settings for newborns are less about hitting a specific number and more about finding a stable baseline that doesn’t fluctuate wildly while you’re trying to sleep.

I remember with my second, I spent a week obsessing over the thermometer, convinced that if the room hit 21 degrees, I was risking SIDS. I was so focused on the air temperature that I forgot the most important rule of thumb: check the chest, not the hands. If their chest or tummy feels warm and their breathing is regular, they are fine. If they are sweaty or their skin feels hot to the touch, you’ve gone too far. Don’t let the fear of a slightly chilly room lead you to overcompensate with too many layers; that’s how you end up with a heat-stressed baby.

Decoding the Baby Sleep Sack Tog Guide So You Can Actually Sleep

The problem with a baby sleep sack tog guide is that it treats a child like a static thermometer rather than a living, breathing, wriggling human being. You’ll see charts online that look incredibly authoritative—0.5 Tog for summer, 2.5 Tog for winter—and they make you feel like if you just follow the math, you’ve won. But those charts don’t account for the fact that your six-month-old might decide to spend the night doing gymnastics, or that your heating system has the temperament of a moody teenager.

I remember with my second, who was about seven months old, I followed the “winter rule” to the letter. I had him in a heavy 3.5 Tog sack, feeling very proud of my preparedness, only to find him sweating through his sleepsuit by midnight. It’s a delicate balance between preventing baby overheating in summer or during a heatwave and making sure they don’t wake up shivering when the temperature drops at 4:00 AM.

The real trick isn’t memorising a spreadsheet; it’s learning how to check their chest or the back of their neck. If they feel clammy, they are too hot. If they feel cool to the touch, add a layer. Trust your hands over the chart.

How to Check Baby Temperature Without the Midnight Panic Attacks

In the ward, we had thermometers for everything, but in your own living room, at 3:00 AM, a thermometer feels like a high-stakes gamble. The biggest mistake I see—and I made it with my second, who was about four months old—is checking a baby’s temperature by feeling their hands or feet. If they’re cold to the touch, you’ll panic and bundle them up in so many infant clothing layers for winter that you end up creating a human sauna. Hands and feet are notoriously bad indicators; they’re the last part of the body to regulate temperature.

Instead, you need to go straight for the source: the chest or the back of the neck. If that skin feels damp, clammy, or even just unusually hot to your palm, you’ve gone too far. This is the real secret to how to check baby temperature without the spiral of dread. If the chest is warm and dry, they are fine. If it’s sweaty, strip a layer. It isn’t about perfection; it’s about that simple, tactile check that tells you whether you can actually close your eyes for another hour.

Preventing Baby Overheating in Summer What the Guidance Ignores

The medical leaflets are very clear about the risks: overheating is a genuine concern for SIDS prevention, and they’ll tell you to keep the room cool and the clothes minimal. But they don’t quite prepare you for the psychological warfare of a heatwave. When it’s 30 degrees outside and your six-month-old is suddenly a puddle of sweat in their cot, the instinct isn’t to follow a manual; the instinct is to strip them naked and panic. I remember with my second, I spent an entire July afternoon terrified that any fabric at all was a hazard, only to realize that a slightly damp muslin cloth was actually more effective than nothing.

The gap in the guidance is that it fails to account for humidity and airflow. You can have the perfect baby sleep safety temperature on your digital monitor, but if the air is stagnant and heavy, that number is lying to you. Don’t just rely on the thermometer; look at the skin. If they’re hot to the touch on their chest or the back of their neck, they’re overdoing it. It’s a delicate dance between following the safety rules and managing the reality of a child who refuses to sleep unless they’re wrapped in something substantial.

Five Rules of Thumb for When the Thermometer Isn't Helping

  • Forget the hands and feet. The textbooks love to tell you to feel a baby’s extremities to check their temperature, but I spent a decade on a paediatric ward seeing parents panic because a newborn’s hands felt like ice cubes. Hands and feet are almost always cool due to developing circulation. If you want to know if they are actually cold, feel their chest or the back of their neck. If that’s warm, they’re fine. If it’s clammy or hot, you’ve gone too far.
  • The ‘One More Layer’ Rule. When I was a nurse, I saw plenty of babies come in looking flushed and sweaty because parents were overcompensating for a slight chill. A good rule of thumb that worked for my second child, when he was about three months old, was to dress them in exactly one more layer than you would comfortably wear yourself to go outside. If you’re shivering in a light jumper, they need that extra layer; if you’re perfectly fine in a t-shirt, they probably don’t need a heavy fleece.
  • Watch the ‘Sweat Check’ more than the ‘Shiver Check’. Babies don’t shiver like we do to generate heat; instead, they tend to overheat, which is much more dangerous for sleep safety. If you see damp hair at the hairline or a red, blotchy chest, strip a layer off immediately. It’s much easier to add a jumper at 4:00 AM than it is to deal with the fallout of an overheated, restless infant.
  • The Fabric Trap. You’ll see beautiful, chunky knit woollen jumpers in shop windows that look lovely, but they are a nightmare for a baby who is trying to regulate their own temperature. Natural fibres like cotton or bamboo are your best friends because they breathe. I learned this the hard way with my eldest; we tried the heavy synthetics and he ended up waking every ninety minutes because he was just too hot. Stick to layers that can be easily peeled off.
  • Context matters more than the number on the wall. A reading of 18°C (64°F) in a nursery with a sleeping baby is a very different thing from 18°C while you’re out for a walk in a pram. If they are stationary and sleeping, they need more insulation because they aren’t generating heat through movement. If you’re out and about, that same temperature requires a windproof outer layer, not just more fleece.

The Short Version (For When You’re Too Tired to Read)

Trust your hands, not the thermometer: A baby’s chest or back should feel warm, but if they’re sweaty or damp, they’re too hot—regardless of what the digital reading on the wall says.

Layers are your best friend, but they have to be practical: Use sleep sacks and onesies to build warmth, but remember that a baby who is wriggling and fighting a heavy fleece is a baby who is going to wake up cranky.

When in doubt, strip one layer back: If you’re staring at the baby at 3:00 AM wondering if they’re shivering or just moving, it is almost always safer to have them slightly too cool than to risk the overheating that leads to a restless, dangerous night.

Trust Your Instincts, Not Just the Thermometer

If you take anything away from this, let it be that there is no perfect, universal formula. You’ve learned the clinical basics: monitor the chest, not the hands, watch for the signs of overheating like flushed cheeks or damp hair, and understand that a sleep sack is your best friend for safety. But remember that the “ideal” temperature range in a textbook doesn’t account for a drafty hallway, a sudden heatwave, or a baby who decides to kick their legs off like a tiny, determined footballer. You are balancing science with real-world variables that no manual can fully predict. The goal isn’t to follow the rules to the letter; it’s to find the middle ground where your baby is comfortable and you aren’t spending your entire night obsessing over a single layer of cotton.

I know how heavy that mental load feels. When you’re staring at a sleeping infant at midnight, wondering if they are a fraction too cold or a degree too warm, it feels like the weight of the world is on your shoulders. But I promise you, you are doing a better job than you think. You have the clinical knowledge and, more importantly, you have the intuition of a parent who knows their own child. Some nights will be a struggle of layering and unlayering, and some days will be perfect. That is okay. You are learning alongside them, and eventually, you won’t need to check the thermometer every twenty minutes. You’ll just know.

Tips on how to do days out cheaply.
Days Out That Cost Almost Nothing

I remember sitting in my car three years ago, staring at a digital booking screen for a “family adventure park,” watching the total climb toward a number that could have paid my mortgage for a week. I had two toddlers in the back, a mounting sense of dread, and the absolute conviction that if I didn’t spend this money, I was somehow failing at the whole “making memories” business. But let’s be honest: most of the advice you find online about how to do days out cheaply is just a list of ways to feel slightly less guilty about being broke, like “bring your own sandwiches” or “look for free museums.” That isn’t a strategy; it’s just survival.

I’m not going to give you a list of Pinterest-perfect excursions that require a degree in logistics and a saint’s level of patience. Instead, I want to talk about the reality of what actually works when you’re juggling a pram, a hungry three-year-old, and a dwindling bank balance. I’ll tell you which “free” attractions are actually worth the petrol, which expensive attractions are a total waste of your sanity, and how to plan a trip that doesn’t end in a meltdown in a crowded car park.

Table of Contents

The Expensive Lie of the Perfect Family Day Out

The Expensive Lie of the Perfect Family Day Out.

The problem starts with the Instagram version of family life. You see the polished photos of a perfectly coordinated crew at a theme park, eating overpriced ice cream with zero signs of a meltdown. It’s a lie. In my experience—and I’ve navigated the logistics of four children at various stages of development—those “perfect” days are often just high-stress, high-cost marathons disguised as memories. We get caught in the trap of thinking that if we aren’t spending a significant portion of our monthly budget, we aren’t “doing it right.”

But here is the truth: a child doesn’t care about the entry fee. My second, when he was three, didn’t care that we weren’t at the big-name zoo; he was utterly captivated by a muddy puddle and a particularly interesting beetle in the local park. When we look for low cost family activities, we aren’t just saving money on excursions; we are actually reducing the sheer number of variables that can go wrong. The more complex the plan, the more ways it can fail—and when you’re dealing with a toddler who has hit their wall, a simple walk in the woods is much easier to manage than a three-hour queue for a ride they’ll end up crying on anyway.

How to Do Days Out Cheaply Without the Meltdown

How to Do Days Out Cheaply Without the Meltdown.

The secret to finding low cost family activities that actually work isn’t about finding the cheapest ticket; it’s about managing the energy levels of the tiny humans involved. When my second child was two, I thought a “bargain” meant a massive zoo trip because the entry fee was low. I forgot that a zoo is essentially a three-mile hike through wind and sun with zero nap options. We ended up sitting in the car park at 2pm, both of us crying, while I calculated how much I’d spent on overpriced lukewarm hot dogs. Now, I look for things that allow for an exit strategy.

If you’re searching for free things to do near me, start with the local library or a woodland trail rather than a theme park. These are the gold standard for saving money on excursions because there is no “pressure to perform.” In a museum, you feel like you’ve wasted money if you don’t see every exhibit. In a park, if the toddler hits a wall after twenty minutes, you just pack up the bag and go home. No guilt, no wasted cash, and no meltdown.

Finding Free Things to Do Near Me That Actually Work

Finding Free Things to Do Near Me That Actually Work

The problem with searching for “free things to do near me” is that the internet usually serves up a list of things that are technically free but practically expensive. I’m talking about the local museum that’s free to enter but charges five quid for a lukewarm coffee, or the “scenic walk” that turns into a logistical nightmare involving a pram, a steep hill, and a sudden downpour. When my second child was two, I thought a trip to the local park was a foolproof way of saving money on excursions, only to realize that a park without a decent toilet is just a field where you’ll eventually have to perform a very awkward diaper change behind a bush.

If you want it to actually work, look for the “hidden” infrastructure. Libraries are the gold standard; they aren’t just for quiet reading anymore, and most have fantastic, air-conditioned toddler sessions that cost nothing. Local nature reserves are better than big-ticket theme parks because they don’t require you to queue for forty minutes in the sun. I’ve found that the most successful low cost family activities are the ones where the goal isn’t “entertainment” but simply changing the scenery before the walls of the house start closing in.

Cheap Day Trip Ideas for When Youre Exhausted

There is a specific kind of exhaustion that hits around month eighteen or two years, when the novelty of “exploring” has been replaced by the sheer physical labor of keeping small humans alive in public. When you are that tired, the last thing you need is a complex itinerary or a long drive to a “must-see” attraction that requires a three-hour queue. Sometimes, the best cheap day trip ideas are the ones that involve the absolute minimum amount of logistics. I’ve found that a local park with a decent playground and a thermos of something strong is often more successful than any curated experience. When my second was two, we stopped trying to “do” things and started just being somewhere else—usually a patch of grass where they could run until they crashed, and I could sit without someone pulling on my sleeve.

If you have a bit more energy but still need to keep the spending at zero, look for those low-stakes, low cost family activities like local library story times or even just a walk through a nearby cemetery or historic site. They are quiet, they are free, and they don’t involve the frantic energy of a theme park. The goal isn’t to create a core memory that requires a photo album; it’s just to change the scenery so you don’t feel like you’re climbing the walls of your own living room.

Saving Money on Excursions and the Inevitable Snack Crisis

Here is the reality of the “snack crisis”: it is never actually about the hunger; it is about the sudden, catastrophic loss of blood sugar that happens exactly ten minutes after you’ve paid fifteen pounds for a mediocre sandwich. I learned this the hard way with my second, who was about two and a half at the time. We had spent an hour navigating a museum, and the moment I reached for my wallet to buy a “healthy” snack, the meltdown began. When you are focused on saving money on excursions, you tend to pack light, but a light pack is often a recipe for a hungry, irrational toddler.

My rule now is simple: pack twice as much as you think you need, and include the “emergency” stuff. I’m talking about the high-value, low-mess items that can be deployed in seconds. When you are looking for affordable weekend trips, the goal is to minimize the number of times you have to interact with a gift shop or a café menu. If you can keep the snacks in the bag and the sugar levels stable, you’ve won half the battle. It’s not glamorous, and it certainly isn’t what the glossy brochures suggest, but it keeps the peace.

Affordable Weekend Trips That Wont Break Your Spirit

When I was working the night shifts on the paediatric ward, I used to see parents who looked absolutely hollowed out—not just from lack of sleep, but from the sheer mental load of trying to “make memories” on a budget that didn’t exist. We tend to think of a weekend trip as this grand, multi-day expedition involving hotels and expensive theme parks, but that is a recipe for a financial hangover and a collective family breakdown. Real affordable weekend trips don’t require a hotel booking; they just require a change of scenery. I’ve found that a single night in a local campsite or even a very basic B&B within an hour’s drive can feel like a massive reset for the kids without the soul-crushing cost of a long-haul journey.

The trick is to stop chasing the “big event” and start looking for low-cost family activities that allow for a slower pace. When my second child was four, we tried to do a “big” weekend at a seaside resort, and it was a disaster of overpriced ice creams and cramped rooms. Now, we look for local nature reserves or small towns with a decent park. It’s about finding places where the main entertainment is just being somewhere else, where the kids can run until they’re tired and you can sit on a bench without feeling like you’re being nickeled and dimed at every turn.

Five Hard-Won Lessons from the Trenches of Cheap Days Out

  • The “Pack the Heavy Stuff” Rule. When my second was three, I tried to be “efficient” and only carry a small bag for a walk in the park. We ended up having to buy a £4 lukewarm juice and a £5 bag of crisps because we’d forgotten the actual food. Pack the thermos, the heavy sandwiches, and the extra layers. It’s harder to carry, but it’s much easier to stomach the weight of a backpack than the weight of a dwindling bank balance and a hungry toddler.
  • Timing the “Free” Window. Most museums and attractions have those lovely, polished websites that don’t mention the 11:00 AM rush. If you want the free stuff without the chaos, aim for the “liminal” hours—either very early or right as the lunch crowd settles. My oldest was four when I realised that being the first person through the gates of a free gallery meant we actually had space to breathe before the sensory overload kicked in.
  • The “One Big Thing” Strategy. Don’t try to do a museum, a park, and a shopping centre in one afternoon just because you’ve left the house. It’s a recipe for a financial leak and a massive meltdown. Pick one free or cheap activity and call it a win. If you do one thing well, you’ve had a day out. If you try to do three, you’ve just had an expensive, exhausting marathon that ends in a car park argument.
  • Pre-empt the “I Want That” Moment. In my nursing days, I saw how much stress comes from sudden, overwhelming needs. The same applies to the supermarket aisle or the gift shop. Before you head out, have a quick chat with the kids (if they’re old enough to listen, which for my middle child at five was a stretch). Set the expectation: “We are going to the woods, and we aren’t going into the cafe.” It doesn’t work 100% of the time, but it’s better than being caught off guard by a meltdown over a £6 ice cream.
  • Use the “Library Loophole.” People forget that local libraries are often the unsung heroes of cheap parenting. Many have dedicated kids’ zones or even small, free weekend events. When I was struggling with the cost of living and the sheer exhaustion of four kids, a two-hour stint in a library was often the only “day out” that didn’t feel like a tactical error. It’s quiet, it’s free, and it’s climate-controlled—which is a win in any season.

The Reality Check: Three Things to Remember When You’re Planning

Forget the Instagram version of a family day out. A successful trip isn’t measured by how many “magical moments” you captured on camera, but by whether you all made it back to the car without someone losing their head (or their dignity). If the goal is just to get out of the house and burn off some toddler energy, you’ve already won.

Budgeting for the “snack crisis” isn’t just about saving pennies; it’s about survival. I learned with my second, who was about eighteen months old, that a hungry child is a tiny, unpredictable chaos engine. Pack more than you think you need, and keep the high-stakes food (the stuff that actually works in a crisis) tucked away for when the meltdown looks imminent.

Lower your expectations for the “big” trips. When you’re trying to do something affordable or a bit further afield, the margin for error is much smaller. If you’re exhausted, don’t aim for a grand adventure; aim for a park, a library, or a walk where the only thing at stake is how many interesting sticks your four-year-old can find.

The Reality Check

At the end of the day, the goal isn’t to tick off every museum or theme park on a list; it’s about finding those small, manageable pockets of connection that don’t leave you staring at your bank balance with a sense of dread. We’ve talked about the snack strategy, the importance of spotting the “wall” before the meltdown hits, and why a local park often beats a pricey zoo when you’re running on three hours of sleep. It comes down to a simple trade-off: you are trading the illusion of a grand adventure for the reality of a day that actually feels sustainable. If you manage to get out the door, find something free to do, and avoid a total financial or emotional collapse, you have absolutely won.

I remember when my eldest was three, and I spent a small fortune trying to make every Saturday feel like a “special event.” I thought the price tag equated to the memory. I was wrong. The memories that actually stuck—the ones we still talk about when they’re older—weren’t the expensive excursions; they were the rainy afternoons in the living room or the cheap ice cream we shared in the car while hiding from a downpour. Please, give yourself permission to do less. Your children don’t need a curated itinerary or a premium ticket to feel loved; they just need you to be present, even if you’re a little bit tired and a lot more budget-conscious.

Complete guide to car seats book cover.
The Complete Guide to Car Seats

If you spend more than ten minutes scrolling through baby gear websites, you’ll be convinced that a car seat needs to cost as much as a used hatchback and come with more sensors than a SpaceX rocket. The marketing tells you that “advanced side-impact protection” and “ergonomic memory foam” are the only things standing between your child and disaster, but after eleven years on a paediatric ward and four kids of my own, I can tell you that most of that is just expensive noise. You don’t need a luxury throne; you need a seat that actually fits your specific car and a way to strap it in that doesn’t leave you sweating and swearing in a supermarket car park. This isn’t your typical, glossy complete guide to car seats designed to make you click ‘add to cart’; it’s about the physics of safety versus the reality of a screaming toddler.

I’m not here to sell you on the latest high-tech gadget. Instead, I’m going to give you the straight truth on what the safety ratings actually mean, how to spot a seat that’s a nightmare to install, and which transitions actually work for a real child. We’ll look at the evidence, but we’ll also talk about the practical failures—like the seat that’s perfectly safe but impossible to get out of when you’re wearing a heavy coat in mid-winter.

Table of Contents

The Manual vs the Midnight Meltdown a Complete Guide to Car Seats

The Manual vs the Midnight Meltdown a Complete Guide to Car Seats

The manual will tell you that infant rear-facing car seats are designed for a specific weight range and that once they hit that limit, it’s time to move on. In a clinical setting, that’s the rule. In my house, it was the moment my second child decided that being upright was a personal affront to his dignity. You’ll read about child passenger safety standards and see diagrams showing perfect, level angles, but those diagrams don’t account for the fact that your car’s seat might be slightly more reclined than the manufacturer intended, or that you’re trying to achieve a perfect convertible car seat installation while a toddler is actively trying to unbuckle themselves.

I remember with my eldest, he was fourteen months old when we finally mastered the tension on the straps. Before that, I’d spent twenty minutes at every single driveway, checking the tightness like I was performing surgery. The truth is, the technical side—the tether anchor usage and the chest clip height—is the part you can learn. The hard part is the patience required when the “perfect” setup results in a meltdown that lasts longer than the actual drive.

Infant Rear Facing Car Seats What Evidence Says and What Actually Happens

Infant Rear Facing Car Seats What Evidence Says and What Actually Happens

The clinical evidence is actually quite straightforward here: infant rear-facing car seats are significantly safer because they distribute the force of an impact across the entire back and head, rather than putting all that stress on a tiny, fragile neck. Most child passenger safety standards suggest keeping them rear-facing for as long as the seat allows—often up to age two or even four. If you look at the physics, it’s a no-brainer.

But here is what happens when you’re actually doing it. You’ll be trying to navigate a convertible car seat installation in the cramped, dark backseat of a mid-sized SUV, wrestling with a sleeping six-month-old who has just managed to get comfortable. The manual tells you the angle has to be perfect, but when you’re exhausted, that millimeter of tilt feels like a mountain. I remember with my second, we spent forty minutes fighting with the tether anchor usage just to get the seat tight enough to pass a level check, only for him to wake up screaming the second the straps were clicked. It’s technically safer, yes, but it is a physical battle against gravity and a very stubborn piece of plastic.

Mastering Convertible Car Seat Installation Without Losing Your Mind

Mastering Convertible Car Seat Installation Without Losing Your Mind

This is the stage where the “infant” part of the journey ends and the “toddler” part begins, and frankly, it’s where most of the stress lives. Transitioning to a convertible car seat feels like a massive promotion, but the actual convertible car seat installation can feel more like a high-stakes engineering exam. The manual will give you a series of diagrams that look perfectly logical on a white background, but they rarely account for the awkward angle of your specific vehicle’s seat or the fact that your two-year-old is currently trying to eat the nylon straps.

When you’re moving from the carrier to the larger seat, pay obsessive attention to the tether anchor usage once they are forward-facing. It’s one of those things that feels like an extra, annoying step when you’re in a rush, but it is non-negotiable for stability. I remember with my second, we spent forty minutes trying to get the tension right, only to realize we’d missed a single clip. It’s frustrating, and it’s okay to feel like you’re failing at a simple task. Just remember: if the seat moves more than an inch in any direction at the belt path, it isn’t done yet.

Tether Anchor Usage the Small Detail That Matters Most

If you look at the fine print in your manual, there is usually a specific instruction about the top tether strap. It feels like an optional extra—just another bit of webbing to fiddle with while you’re trying to wrestle a sleeping toddler into their harness—but it is actually one of the most critical components of tether anchor usage. The tether is designed to stop the top of the seat from pitching forward in a collision, keeping the child’s head and neck in a much safer position. When my second child was eighteen months old, I remember thinking the strap was just getting in the way of a tidy-looking installation, but the physics don’t care about aesthetics.

The problem is that many people skip this step because they can’t find the anchor point, or it’s tucked behind a headrest. It’s a common failure mode. If you are navigating a complex convertible car seat installation, do not assume that because the base is locked tight, you are finished. Take the extra thirty seconds to find that anchor. It is the difference between the seat staying stable and it rotating forward when it matters most.

Child Passenger Safety Standards Separating Real Risk From Parental Guilt

When I was working on the ward, I saw parents come in looking absolutely shell-shocked because they’d read some new study about crash test dynamics, or because a well-meaning relative had told them their seat was “outdated.” There is a massive difference between understanding child passenger safety standards and letting them become a source of constant, low-grade panic. The regulations are there to provide a baseline of physics-based protection, but they aren’t a moral barometer for how much you love your child. If you’ve checked that the seat is appropriate for their weight and you’ve secured the tether, you are doing the job.

The guilt usually creeps in around the transition points—like when you’re debating booster seat age requirements or wondering if you’re moving to a forward-facing seat too soon. I remember my second, when I spent forty minutes staring at the harness straps, convinced I was somehow failing a test I hadn’t even studied for. The truth is, unless you’ve actually had a collision or a professional has performed a car seat safety inspection, most of that anxiety is just noise. Focus on the mechanics, not the “what ifs.”

Booster Seat Age Requirements and the Final Car Seat Safety Inspection

The transition from a harnessed seat to a booster is where a lot of parents—myself included—start to get a bit too confident. You look at your child, they look taller, and you think, “Right, they’ve outgrown the big seat.” But here is the thing: booster seat age requirements are often a suggestion, while physical milestones are the reality. My second child was nearly five when we made the switch, but he was still so small that the lap belt sat dangerously high on his stomach rather than his hips. Even if the law says they can move up, if the belt isn’t sitting across the strong bones of the pelvis, they aren’t actually safe.

Before you commit to the new setup, you need to perform a proper car seat safety inspection of the new arrangement. Don’t just click it in and drive away. Check the belt path, ensure there’s no slack, and—this is the part everyone forgets—make sure they can actually sit with their back against the seat without slouching. If they’re leaning forward or twisting, the booster isn’t doing its job. It’s a small adjustment, but it’s the difference between a seat that works and one that’s just a glorified chair.

Five Things the Safety Manual Won't Tell You (But Your Sanity Needs to Hear)

  • The “Pinch Test” is your best friend, but don’t do it when you’re rushed. When my second child was about 14 months old, I thought I’d tightened the harness perfectly, only to realize later I could grab a whole fistful of webbing. If you can pinch the strap and it folds, it’s too loose. Do this check every single time you load the car, especially after a frantic grocery run.
  • Buy the seat for the child you have, not the child you’re expecting. I see parents constantly looking at “next stage” seats because they want to save money, but a seat that’s too big for a two-year-old means the harness won’t sit in the right place. It’s better to outgrow a well-fitted infant seat by six months than to spend a year struggling with a convertible seat that doesn’t actually hold them securely.
  • The “One-Handed Struggle” is real, so choose your hardware wisely. When I was working nights on the ward, I learned that efficiency is safety. If you can’t operate the harness or the ISOFIX clips with one hand while holding a squirming toddler in the other, you’re going to get frustrated, and frustration leads to mistakes. Test the buckles in your living room before you’re stuck on a dark driveway.
  • Don’t let a heavy winter coat become a safety hazard. This is a classic mistake I saw all the time in the hospital. If you strap a child in wearing a massive puffer jacket, the harness will feel tight, but the compression of the coat means there’s a huge gap between the strap and their body during an impact. Always buckle them in their normal clothes, then layer the warm coat over the top of the harness.
  • Accept that some days, the “perfect” installation will feel like a battle. There is no shame in needing to pull over or take a breath if you can’t get the seat to click right on the first go. I remember my third, when he was nearly two, and I spent ten minutes swearing at an LATCH connector in the rain. If it doesn’t feel solid, it isn’t done. Take the extra five minutes; the road isn’t going anywhere.

The Bottom Line: What to Remember When You’re Tired

Trust the physics, but watch the fit. The safety standards tell you the seat will protect them in a crash, but they don’t tell you that a seat installed perfectly according to the manual can still feel like a torture device to a fussy ten-month-old. Aim for the technical “correctness” first, then adjust for comfort where you can without compromising the harness.

Rear-facing is the gold standard for a reason, even if it makes your life harder. The evidence is clear that it protects their tiny necks and spines, but I know from my second child that trying to load a sleeping baby into a rear-facing seat in a dark car park is a special kind of misery. Do it anyway; the extra struggle is worth the peace of mind.

Stop looking for the “perfect” seat and start looking for the “right” one for your specific life. A high-end, expensive seat is useless if it’s a nightmare to install in your specific car or if it doesn’t fit your actual daily routine. Safety isn’t found in a luxury brand; it’s found in a seat that is installed correctly every single time, even when you’re exhausted.

The Long Road Ahead

We have covered a lot of ground, from the rigid physics of tether anchors to the messy, tear-filled reality of trying to strap a wriggling two-year-old into a convertible seat while the rain lashes against the windscreen. If you remember nothing else, remember this: the manual provides the framework, but your intuition—tempered by checking those straps one more time before you pull out of the driveway—is what keeps them safe. Whether you are navigating the transition from rear-facing to forward-facing or finally graduating to a booster, remember that safety isn’t about perfection; it is about consistent, informed choices made amidst the chaos of everyday life.

I know how heavy that responsibility feels. I’ve sat in those hospital waiting rooms, and I’ve sat in my own driveway, staring at a car seat and wondering if I’ve done enough. But please, hear me when I say this: you are doing a good job. The fact that you are reading this, obsessing over the fine print and worrying about the angles, is proof that you are the parent your child needs. Parenting is a series of small, often exhausting decisions, and while the car seat might feel like just another thing to get “right,” it is ultimately just one part of a much larger, much more beautiful journey. Take a breath. You’ve got this.

How to travel long distances with children.
Long Journeys With Children, Broken Into Blocks

I remember sitting in a terminal at Heathrow, staring at a brightly coloured travel brochure that promised “stress-free family adventures,” while my two-year-old was currently attempting to eat a discarded boarding pass and my four-year-old was weeping because his juice box was “too loud.” The travel industry loves to sell you a version of how to travel long distances with children that involves pristine linen outfits and perfectly timed naps in ergonomic car seats. But as a former paediatric nurse, I can tell you that the brochures don’t account for the biological reality of a toddler hitting a sleep regression in the middle of a six-hour drive, or the sheer, unadulterated chaos of a delayed flight when everyone’s blood sugar has bottomed out.

I’m not here to sell you a specific brand of expensive distraction toy or a rigid itinerary that will inevitably fall apart by noon. Instead, I want to give you the version of this guide that actually works when you’re exhausted and cornered in a cramped middle seat. I’ll share what the clinical evidence suggests about routine and sensory input, but more importantly, I’ll tell you what I’ve learned from four different children who all decided to test my sanity in different ways. We’re going to focus on survival, sanity, and realistic expectations, because if you make it to the hotel without a total meltdown, you’ve already won.

Table of Contents

Understanding How to Travel Long Distances With Children

Understanding How to Travel Long Distances With Children

Before we get into the nitty-gritty of bags and schedules, we have to address the fundamental mismatch between “travel logic” and “child logic.” When I was on the ward, I saw parents arrive for trips looking like they’d prepared for a military operation, only to be completely undone by a single missed nap or a spilled juice box. The mistake most people make is treating a long journey like a logistical puzzle to be solved, rather than a series of unpredictable physiological shifts. A three-year-old doesn’t care that you’ve optimized your route; they care that their body feels weird because they’re in a car seat instead of their own bed.

To survive this, you have to stop aiming for a “seamless experience”—that’s a myth sold by people who don’t have kids. Instead, your goal is damage limitation. Whether you are looking for flying with infants tips or trying to assemble a long distance car ride survival guide, you have to plan for the inevitable dip in mood. I learned with my second, who was nearly two at the time, that if you don’t account for the “witching hour” hitting right as you cross a state line, you aren’t planning; you’re just hoping. And hope is a very poor substitute for a well-timed snack.

Key Things to Know

Key Things to Know: Traveling with kids.

First, let’s talk about the logistics that actually matter when you’re mid-transit. The textbooks will give you a generic traveling with kids packing list, but they won’t tell you that the most important item is often the one you forgot because it seemed too obvious. When my second was eighteen months old, I learned the hard way that a “complete” bag is useless if it doesn’t include a change of clothes for you as well as the child. If a spilled juice box or a sudden bout of motion sickness happens in a cramped car or a middle seat, you don’t want to be the parent trying to change a toddler while wearing a pristine white shirt.

Secondly, you have to accept the reality of the “window of tolerance.” Whether you are looking for flying with infants tips or planning a twelve-hour drive, there is a specific point where stimulation turns into sensory overload. I’ve seen it happen with my three-year-old: ten minutes of quiet play, then suddenly, the world is ending because a cracker broke. You cannot schedule your way out of a meltdown, but you can prepare for the inevitability of the crash by having high-value, low-mess distractions ready to deploy before the screaming starts.

Practical Tips and Steps

Practical Tips and Steps for packing kids.

First, let’s talk about the gear. The clinical advice says to pack light, but my experience with four kids has taught me that a “minimalist” approach is just a recipe for a crisis in a service station at midnight. Your traveling with kids packing list needs to be more than just clothes; it needs to be a tactical kit. For my second child, who was two at the time, I learned that the most important item wasn’t a fancy new toy, but a stash of kid friendly travel snacks that didn’t require a table to eat. Think pouches, crackers, and things that don’t crumble into a mountain of dust the moment you hit a pothole.

When it comes to the actual movement, whether you’re in a car or at thirty thousand feet, the goal isn’t constant entertainment—it’s managing the energy. If you’re looking for flying with infants tips, my rule of thumb is to time the heavy lifting around their natural nap windows, but don’t be surprised when a teething six-month-old decides that a pressurized cabin is the worst place on earth to be. The trick is having “novelty” items—things they haven’t seen in a week—ready to deploy only when the tension in the backseat starts to rise.

Common Mistakes to Avoid

The biggest mistake I see—and I’ve made it myself, usually while staring blankly at a lukewarm coffee in a service station—is the “Optimism Trap.” We plan the trip based on the best version of our children. We think, “Leo is four now, he’ll love looking out the window,” forgetting that at four, he also has the attention span of a goldfish and the emotional volatility of a Shakespearean tragic hero. If you treat your traveling with kids packing list like a checklist for a peaceful journey rather than a toolkit for inevitable chaos, you’re going to be caught off guard. Don’t pack for the child you wish they were; pack for the one who is currently losing their mind because their toast was cut into triangles instead of squares.

Another pitfall is the “Sanity Sacrifice,” where we try to maintain strict routines that simply cannot exist in a moving vehicle or a pressurized cabin. I used to try and stick to exact nap times with my second, which worked fine when he was eighteen months old, but by the time he was three, trying to force a nap in a car seat was just a recipe for managing toddler tantrums during travel that lasted three states. Stop fighting the environment. If the schedule breaks, let it break. You can recover a routine once you’re behind a closed door; you can’t recover your dignity in the middle of Terminal 5.

Final Thoughts

If you’ve made it this far through the checklists and the tactical advice, you’re probably already mentally rehearsing the battle. I’ve been there. I remember when my second was eighteen months old; we thought we were masters of the universe because we had a perfectly curated traveling with kids packing list and a car full of pristine, un-crushed crackers. Then, two hours into a four-hour stretch, the reality of a meltdown in the backseat hit us, and that list felt like a cruel joke.

The truth is, no amount of road trip essentials for toddlers or carefully planned distraction techniques can fully insulate you from the chaos of a tired child in a confined space. There will be moments when the “expert” advice fails, and you’ll find yourself sitting in a service station at midnight, wondering why you didn’t just stay home. When that happens, give yourself some grace. You aren’t failing at travel; you are simply navigating the messy, unpredictable reality of being a parent. Pack the snacks, prepare the toys, but most importantly, prepare to pivot when the plan goes sideways.

Five things the travel brochures won't mention

  • Pack for the ‘lost and found’ moments, not the itinerary. The textbooks tell you to pack a neat little bag of essentials, but they don’t account for the moment your three-year-old decides their favourite, crusty, half-chewed teddy is the only thing keeping them from a total neurological collapse in a middle seat. I always tell parents: pack twice as many ‘comfort items’ as you think you need, and keep one specific, low-stakes toy hidden away for the exact moment the boredom turns into a tantrum.
  • The ‘Buffer Hour’ rule. When I was nursing, I saw parents arrive at the airport or station with military precision, only to be undone by a single spilled juice box. My rule now—which I started applying when my second child was eighteen months old—is to build a sixty-minute ‘chaos buffer’ into every transition. If the flight is at noon, you act like it’s at eleven. That extra hour is what you use to find the missing shoe or deal with the sudden, inexplicable refusal to wear trousers.
  • Food is a tactical tool, not just nutrition. Don’t rely on the lukewarm, overpriced sandwiches available at the terminal. I’ve learned through four different children that a well-timed, high-protein snack can be the difference between a smooth journey and a meltdown. When my eldest was four, I realised that ‘grazing’ is much more effective than ‘meals’ when you’re stuck in a car or a plane; small, frequent bites keep the blood sugar steady and the irritability low.
  • Lower your expectations of ‘quality time.’ There is a pervasive myth that long trips are opportunities for beautiful family bonding. In reality, if you’re travelling with a toddler or a preschooler, success is simply everyone arriving at the destination without anyone being physically injured or emotionally traumatised. When my third child was two, I stopped trying to make the car journey ‘educational’ and started just trying to make it ‘quiet.’ Sometimes, a heavy dose of a mindless cartoon is the most practical parenting tool you have.
  • Know when to call it a loss. There is a specific kind of parental guilt that hits when you realize the ‘planned activities’ are failing. If your five-year-old is currently screaming because the plane’s air vent is ‘looking at them funny,’ stop trying to follow the schedule. The schedule is dead. In my nursing days, we called it triage; in parenting, I call it survival. Forget the museum booking for tomorrow; just focus on getting through the next twenty minutes.

The Short Version (For When You’re Too Tired to Read)

Trust the evidence for the logistics, but trust your gut for the crisis management; a textbook can tell you how to pack a diaper bag, but it can’t tell you how to stay calm when a three-year-old decides the plane is the worst place on earth.

Plan for the “failure modes”—the delayed flights, the missed naps, and the spilled juice—because if you only prepare for the perfect itinerary, you’ll be halfway to a breakdown by the first unexpected hiccup.

Lower your expectations of yourself; you aren’t failing if the trip is messy, you’re just parenting in a high-pressure environment, and sometimes “getting there in one piece” is a much better goal than “following the schedule.”

The Reality Check

If you’ve taken anything from this, let it be this: you cannot plan your way out of a toddler’s bad mood or a flight delay. You can pack the snacks, download the shows, and time the naps with surgical precision, but at some point, the spreadsheet will fail you. I learned that the hard way with my second child, who decided a six-hour train journey was the perfect time to discover he actually hated being contained. The goal isn’t to achieve a flawless, silent transit; the goal is to manage the fallout when things inevitably go sideways. Focus on the essentials—hydration, distraction, and your own patience—and accept that the journey is going to be messy.

When you’re sitting in a cramped seat, feeling the heat of a meltdown and the weight of every stranger’s stare, please remember that you aren’t failing. You are just parenting in a high-pressure environment. I’ve seen parents in the hospital wards who were navigating much more complex crises with far more grace than you’ll feel like you have right now. Long-distance travel is a marathon, not a sprint, and the destination is worth the chaos. Once you’re finally through the door of your hotel or home, take a breath, order some takeaway, and remind yourself that you survived. You’ll get there.

How to change a nappy efficiently.
Nappy Changes That Do Not Fully Wake Them

I remember standing in a dimly lit hospital corridor during a night shift when my second child was just six weeks old, staring at a mountain of “essential” changing station organisers and wipe warmers. The training manuals I’d lived by for eleven years suggested a clinical, step-by-step precision, but they never quite accounted for the sheer chaos of a baby who has decided that 3:00 AM is the perfect time to practice their gymnastics. If you are currently searching for how to change a nappy efficiently because you’re tired of finding poo on the ceiling or your own sleeve, I want you to know that the fancy gadgets aren’t the answer.

I’m not going to give you a list of expensive products that promise to turn your living room into a sterile ward. Instead, I’m going to give you the stripped-back, battle-tested reality of what actually works when you’re exhausted and the baby is wriggling like an eel. We’ll talk about the logistics of survival—the stuff the leaflets leave out—so you can get the job done, keep the mess contained, and hopefully get back to sleep before the sun comes up.

Table of Contents

Understanding How to Change a Nappy Efficiently

Understanding How to Change a Nappy Efficiently

When I was working the night shifts on the paediatric ward, everything was about protocol and sterile fields. You had a system, a tray, and a set of rules that made sense in a controlled environment. But once my second child, Leo, hit the six-month mark and discovered the joy of tactical kicking, I realised that clinical efficiency and “parenting efficiency” are two very different beasts. To actually get through this without a disaster, you have to stop thinking like a nurse and start thinking like a tactician.

The secret isn’t just speed; it’s about minimizing mess during diaper changes by anticipating the chaos. Most people focus on the nappy itself, but the real battle is won or lost in your diaper changing station organization. If you have to hunt for a wipe while a wriggling six-month-old is mid-roll, you’ve already lost. I learned the hard way with my third that having a dedicated nappy changing essentials checklist—things within arm’s reach, always—is the difference between a thirty-second task and a ten-minute cleanup of the carpet.

Key Things to Know

Key Things to Know: Nappy Changing Essentials

First, let’s talk about the gear. In the hospital, we had everything clinical and sterile, but at home, you just need a nappy changing essentials checklist that actually works for your specific layout. If you’re constantly getting up to find a wipe or a fresh nappy, you’ve already lost the battle. I learned this the hard way with my second child, who was about seven months old and had just discovered the joy of the “bicycle kick” during a change. If your diaper changing station organization is even slightly off, that’s when the mess migrates from the nappy to your clean shirt.

Secondly, don’t ignore the skin. The textbooks will tell you to be meticulous with baby skin care during changes, and they’re right, but they don’t tell you how much harder it is when the baby is actively trying to climb out of the changing area. When my eldest was a toddler, I learned that preventing diaper rash efficiently isn’t just about the cream you use; it’s about the speed and the dryness of the skin before the new nappy goes on. It’s a fine line between being thorough and being too slow for a wriggling human.

Practical Tips and Steps

Practical Tips and Steps for diaper organization.

First, let’s talk about your setup. The clinical manual tells you to have a sterile environment, but my reality is a pile of laundry and a half-eaten toast crust near the changing mat. What actually matters is your diaper changing station organization. If you have to get up to find a wipe while a six-month-old is actively trying to roll off the surface, you’ve already lost the battle. Keep your nappy changing essentials checklist within arm’s reach—wipes, clean nappy, cream, and a disposal bag—so you never have to break eye contact or leave them unsupervised.

When it comes to the actual movement, the trick is in the “one-handed hover.” If you’re dealing with a wriggling eight-month-old, you cannot use two hands to manage the nappy and the wipes. Use one hand to steady them (firmly but gently) and the other to work. I found that minimizing mess during diaper changes often comes down to the “fold and lift” method: lift the legs by the ankles, slide the soiled nappy under them, and use that as a temporary barrier while you clean. It’s messy, it’s not graceful, but it keeps the blowout from migrating to their back.

Common Mistakes to Avoid

The biggest mistake I see—and I’ve made it myself more times than I care to admit—is the “one-handed gamble.” You think you’re being clever by grabbing a wipe while holding the baby with one hand, but that’s exactly when a wriggling ten-month-old decides to perform a sudden, unchoreographed somersault. Suddenly, you’re not just changing a nappy; you’re performing damage control on a rug. If you want to focus on minimizing mess during diaper changes, you have to stop treating it like a race. Slow down, get your supplies in reach, and never let go of that child with your free hand.

Another one that catches people out is the “quick wipe and go” approach. When you’re exhausted, it’s tempting to just sweep a wipe across the skin and snap the fresh nappy on, but that’s a fast track to disaster. If you aren’t paying attention to baby skin care during changes, specifically ensuring the skin is completely dry before the next layer goes on, you’re practically inviting a bout of nappy rash. I learned that the hard way with my second; I thought I was being efficient, but I was actually just creating a problem that kept us both awake for three nights straight.

Final Thoughts

If you’re looking for a way to make this a seamless, clinical process that works every single time, I’m going to let you down. Even with a perfect nappy changing essentials checklist laid out in front of you, there will be that Tuesday night where the wipes are cold, the baby is teething, and you feel like you’re losing a battle against gravity and gravity-defying poo. When I was nursing on the ward, everything was sterile and predictable; when I’m at home with my middle two, it’s mostly just about minimizing mess during diaper changes so I don’t have to scrub the carpet at dawn.

The goal isn’t perfection; it’s just getting through it with your sanity intact. Focus on the basics—keeping the skin clean and the area dry—and don’t beat yourself up if you miss a step or end up with a bit of a mess on your sleeve. At the end of the day, baby skin care during changes is more important than how tidy your station looks. If they’re clean, dry, and (eventually) asleep, you’ve done a brilliant job.

The "Real World" Survival Kit: 5 Ways to Speed Things Up

  • The Pre-Flight Check. The medical manuals talk about “hygiene stations,” but in reality, this is just about not being caught empty-handed. When my second was about ten months old, he discovered the joy of the “tactical roll” the second the nappy came off. If you don’t have wipes, a clean nappy, and a disposal bag within arm’s reach before you even unfasten the onesie, you’re going to spend the next ten minutes chasing a moving target.
  • The One-Handed Rule. This is a skill you learn when you’re holding a heavy, sleepy six-month-old who refuses to stay still. You have to be able to grab a wipe or a fresh nappy with one hand while the other maintains a steady, calming grip on the baby. If you find yourself needing two hands for every single movement, you’re working too hard and moving too slowly.
  • Use the “Distraction Pivot.” At about fourteen months, my eldest became a professional wrestler during changes. The clinical advice is to “maintain a calm environment,” but that doesn’t work when there’s a tiny human trying to escape. Keep a specific, “nappy-only” toy nearby—something loud or high-contrast that they only see during changes. It buys you thirty seconds of stillness, which is often all you need to get the job done.
  • The Barrier Method. When you’re dealing with a particularly messy situation—and we’ve all been there at 3:00 AM—don’t try to be precious about the changing mat. I learned early on that having a dedicated, wipeable waterproof layer is much faster than trying to clean a fabric cover mid-change. Speed comes from knowing you can wipe the mess away in one swipe rather than scrubbing.
  • Don’t Fight the Physics. If a toddler is arching their back like a professional gymnast, stop trying to force them flat. You’ll just end up with a mess on the ceiling or a bruised ego. Sometimes the most “efficient” way to change a nappy is to let them sit up for a moment, do a quick wipe, and then lay them back down. It feels like you’re losing time, but you actually save time by avoiding a meltdown.

The Reality Check

Preparation is your only shield; if you have to leave a wriggling six-month-old alone to hunt for a wipe, you’ve already lost the battle.

Forget the “perfect” technique you read about in textbooks; when it’s 3:00 AM and they’re leaking, “done and clean” is a much better goal than “textbook efficient.”

Watch for the “escape artist” phase—around 8 to 10 months, they stop being passive lumps and start treating nappy changes like a wrestling match, so keep one hand on them at all times.

The Reality of the Routine

At the end of the day, efficiency isn’t about following a clinical checklist or having a perfectly curated changing station that looks like a lifestyle magazine spread. It’s about the small, practical wins: having the wipes within reach before the wriggling starts, knowing which way the nappy tabs go without looking, and having a plan for when the “explosion” happens. I remember when my second, Leo, was about eight months old; he decided that every nappy change was an opportunity for a gymnastics routine. I learned then that you can have all the technique in the world, but sometimes efficiency just means getting the mess contained before it reaches the carpet. Stick to the basics, prep your station, and don’t beat yourself up when a “quick” change turns into a ten-minute tactical maneuver.

If you’re reading this while sitting in a darkened room, exhausted and wondering why such a simple task feels so monumental, please hear me: you are doing fine. The manuals don’t tell you that the most important part of a nappy change isn’t the speed or the neatness, but the quiet moment of connection between you and your child. Whether they are a newborn or a defiant two-year-old, these tiny, messy, repetitive moments are the building blocks of their security. You aren’t failing because it’s difficult; it’s difficult because it’s real. Take a breath, wipe the mess, and remember that this stage, as exhausting as it is, is only a season.